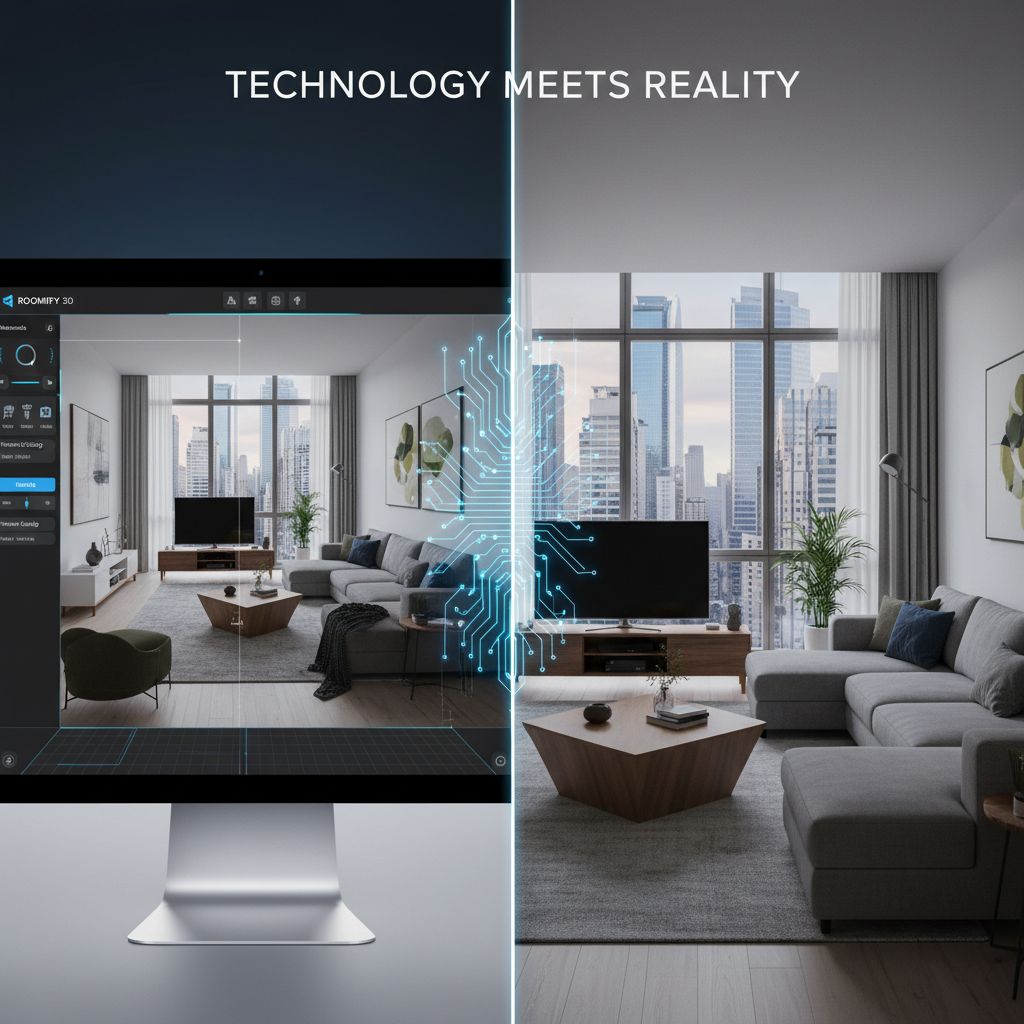
Planning a room redesign used to mean sketching on graph paper and guessing how furniture would fit. Today's 3D room planning tools let you visualize every detail before moving a single piece of furniture or spending a dollar. Whether you're renovating a kitchen, designing a new bedroom, or just rearranging your living room, 3D planning software transforms guesswork into confidence.
This complete guide covers everything from choosing the right 3D room planner to mastering advanced techniques. You'll learn which tools work best for your needs, how to create accurate floor plans, and what mistakes to avoid.
What is 3D Room Planning?
3D room planning uses digital software to create three-dimensional representations of interior spaces. Unlike traditional 2D floor plans that show rooms from above, 3D planners let you see exactly how your design will look from every angle, complete with furniture, colors, lighting, and materials.
Technology Explanation
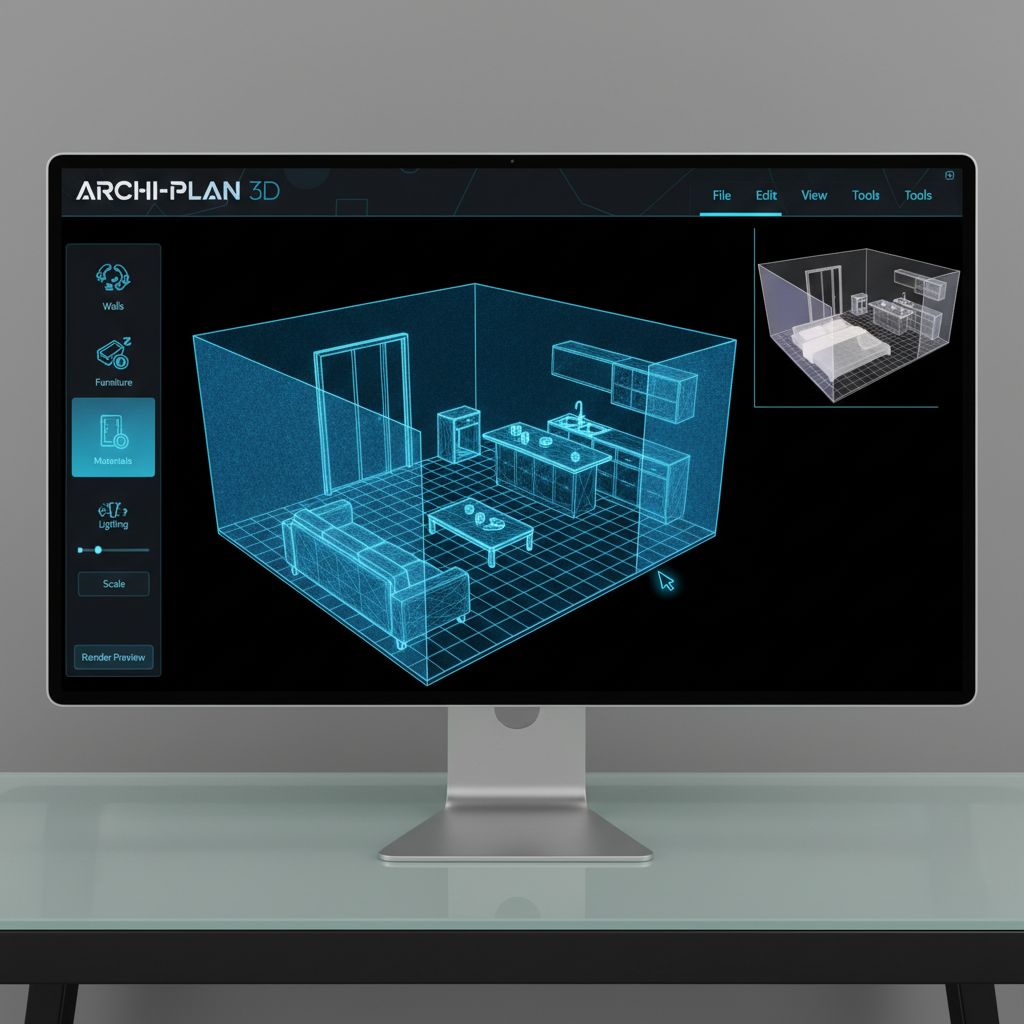
Modern 3D room planners use sophisticated rendering engines similar to video game technology. You input room dimensions, add walls and doors, then populate the space with furniture from extensive libraries. The software calculates perspectives, shadows, and spatial relationships in real-time, creating photorealistic views of your future room.
How It Works
- Create walls and define room dimensions
- Add architectural elements (windows, doors)
- Place furniture from digital libraries
- Apply materials, colors, and textures
- View from multiple angles and perspectives
- Generate photorealistic renders
Key Capabilities
- Accurate scale and proportions
- Real-time design updates
- Virtual walkthroughs
- Lighting simulation
- Material visualization
- Cost estimation tools
Benefits Over 2D Planning
Visual Clarity
See exactly how your room will look from every angle. No more trying to imagine how a 2D floor plan translates to real life.
Better Decisions
Test multiple furniture arrangements, color schemes, and layouts before committing. Avoid expensive mistakes.
Accurate Planning
Ensure furniture fits perfectly. Check clearances, traffic flow, and proportions with precision.
Client Communication
If working with contractors or designers, 3D plans eliminate misunderstandings about your vision.
Cost Savings
Identify problems before construction or purchasing. Save thousands by getting it right digitally first.
Time Efficiency
Make changes in minutes instead of hours. Experiment freely without physical labor.
When to Use 3D vs Traditional Methods
Best for 3D Planning
- Complete room renovations or new builds
- Complex layouts with custom furniture
- Kitchen and bathroom designs
- Projects over $5,000 investment
- Multiple stakeholder decisions
Traditional Planning Works For
- Simple furniture rearrangement
- Quick decorative updates
- Standard room layouts
- Small budget projects (under $1,000)
- When you already know exactly what you want
Best 3D Room Planner Tools 2025
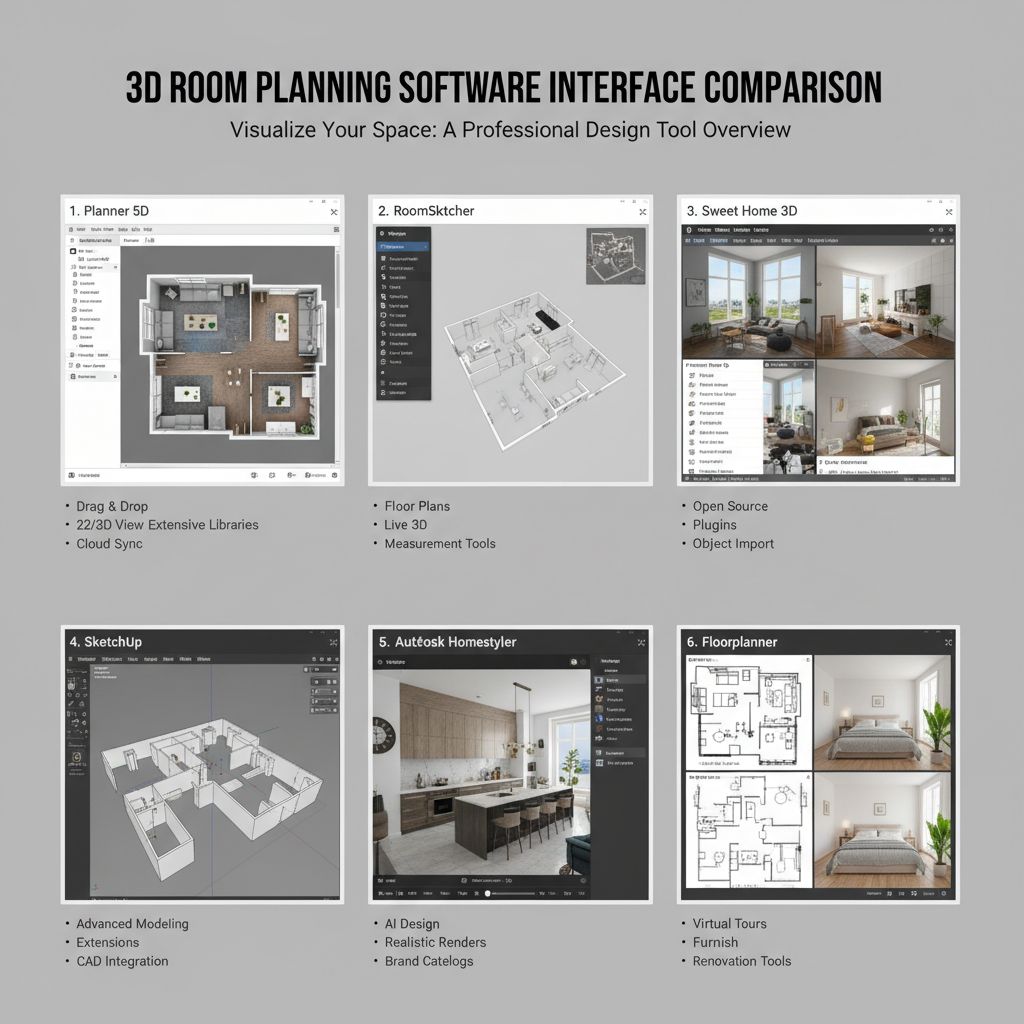
We tested 15+ 3D room planning tools over three months, creating identical room designs in each to compare features, ease of use, and results. Here are the best options for different needs and budgets.
Free 3D Room Planners
1. SketchUp Free
Professional-grade tool with browser-based access
Overall Score
Pros
- Powerful 3D modeling capabilities
- Extensive free object library (3D Warehouse)
- No download required (web-based)
- Professional results possible
- Active community and tutorials
Cons
- Steep learning curve for beginners
- Can be overwhelming at first
- Less intuitive than specialized room planners
- Requires time investment to master
Best For:
Users willing to invest time learning powerful software. Great for complex projects and those who want professional-grade free tools.
2. Sweet Home 3D
User-friendly desktop application for home design
Overall Score
Pros
- Easy to learn and use
- Works offline (desktop app)
- Good furniture catalog included
- Fast rendering for quick previews
- Import custom furniture models
Cons
- Basic graphics compared to premium tools
- Limited material options
- Dated interface design
- Less realistic renderings
Best For:
Beginners who want free, straightforward software without cloud dependencies. Perfect for basic room planning and furniture arrangement.
3. Floorplanner
Browser-based with free tier limitations
Overall Score
Pros
- Very intuitive drag-and-drop interface
- Beautiful 3D visualizations
- Cloud-based (access anywhere)
- Quick to create basic plans
Cons
- Free tier very limited (1 project)
- Watermarks on free exports
- Fewer furniture options than competitors
- Need paid version for full features
Best For:
Testing 3D planning before committing to paid software. Good for single-room projects if you don't mind watermarks.
Premium 3D Room Planners
1. Chief Architect
Professional architecture and interior design software
Overall Score
Features
- Photorealistic rendering engine
- Extensive material and object libraries
- Virtual reality walkthrough capability
- Advanced lighting simulation
- Construction documentation tools
- Cost estimation integration
Pricing & Limitations
- $2,995 one-time purchase
- Steep learning curve (weeks to master)
- Overkill for simple projects
- Requires powerful computer
Best For:
Professional designers and serious DIYers planning major renovations or new builds. Worth the investment if doing multiple large projects.
2. Decoratly AI Design Mode
AI-powered instant visualization (modern alternative)
Overall Score
Unique Advantages
- No 3D modeling required - upload photo
- AI generates complete redesigns instantly
- 50+ style presets available
- See results in 30 seconds
- Much easier than traditional 3D tools
- Works with any room photo
Pricing
- Free: 2 room designs
- $3.99: 24-hour unlimited access
- $7.99: 7-day unlimited + 4K export
- $15.99: Monthly unlimited + features
Best For:
Anyone who wants professional design results without learning complex 3D software. Perfect for visualizing changes before implementing them.
3. RoomSketcher
User-friendly premium planner with good balance
Overall Score
Features
- Intuitive interface, easy to learn
- High-quality 3D renders
- 360° panoramic views
- Good furniture and material libraries
- Multiple export options
Pricing
- Free: Limited projects, watermarks
- $49/year: Basic features
- $99/year: VIP with full features
- $249/year: Pro for professionals
Best For:
Homeowners who want professional-looking plans without professional-level complexity. Good middle ground between free and ultra-premium tools.
Comparison Matrix
| Tool | Ease of Use | Visual Quality | Learning Time | Cost |
|---|---|---|---|---|
| SketchUp Free | ⭐⭐⭐ | ⭐⭐⭐⭐ | 2-3 weeks | Free |
| Sweet Home 3D | ⭐⭐⭐⭐ | ⭐⭐⭐ | 2-3 days | Free |
| Floorplanner | ⭐⭐⭐⭐⭐ | ⭐⭐⭐⭐ | 1 hour | $29/mo |
| Chief Architect | ⭐⭐ | ⭐⭐⭐⭐⭐ | 4-6 weeks | $2,995 |
| Decoratly AI | ⭐⭐⭐⭐⭐ | ⭐⭐⭐⭐⭐ | 5 minutes | $3.99+ |
| RoomSketcher | ⭐⭐⭐⭐ | ⭐⭐⭐⭐ | 2-3 hours | $49-249/yr |
Step-by-Step 3D Room Planning Process
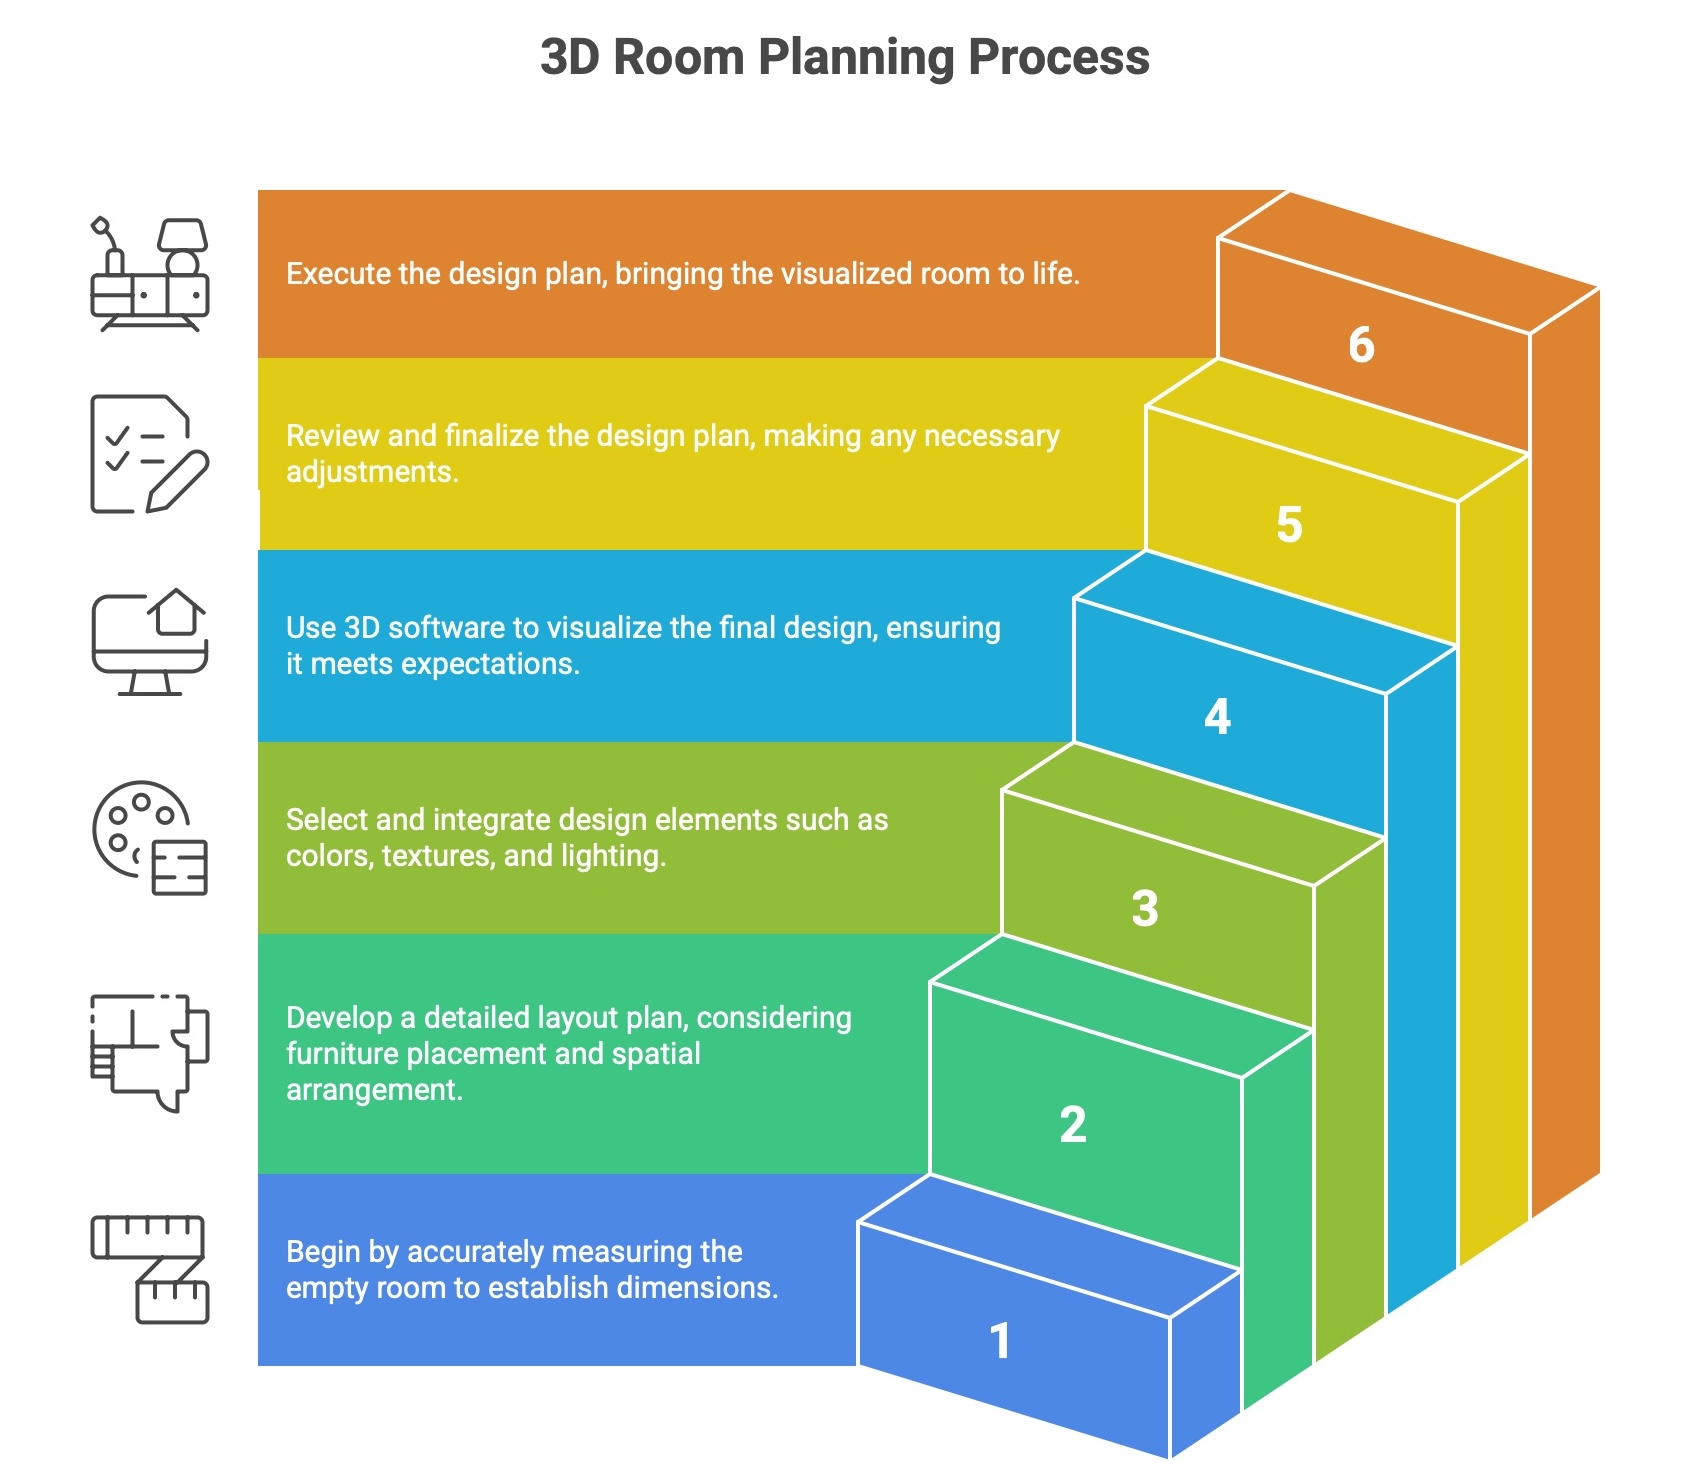
Creating an accurate 3D room plan requires methodical steps. Follow this process whether using free or premium software to ensure professional results.
Phase 1: Measurements and Documentation
Essential Measurements
Accurate measurements are crucial. A 3D plan is only as good as the data you input. Take these measurements carefully:
- Wall lengths: Measure each wall from corner to corner
- Ceiling height: Floor to ceiling, check if consistent
- Windows: Width, height, distance from floor, from corners
- Doors: Width, height, swing direction, from corners
- Fixed elements: Radiators, outlets, built-ins
Tools You'll Need
Measuring Tape
25-foot minimum. Laser measures are faster and more accurate for $30-50.
Notepad or App
Record measurements immediately. MagicPlan app can help create basic floor plans from photos.
Camera/Phone
Photograph the room from each corner. These reference photos help during 3D creation.
Pro Tip: The Sketch Method
Draw a rough overhead sketch as you measure. Note dimensions on the sketch. This prevents confusion later and helps you catch missing measurements before leaving the room.
Phase 2: Software Selection and Setup
Choose Your Tool
Based on your project complexity and budget, select from the tools reviewed above. For first-timers, start with Sweet Home 3D or Floorplanner for easier learning curves.
Set Project Parameters
Create new project and set units (feet/inches or meters). Input your ceiling height as default. This ensures all walls are created at correct height automatically.
Complete Tutorial
Most software includes quick-start tutorials (10-20 minutes). Don't skip these - they teach efficient workflows that save hours later.
Phase 3: Basic Room Creation
Building Walls
- 1. Start with longest wall as reference point
- 2. Create walls clockwise around room perimeter
- 3. Input exact measurements for each wall
- 4. Ensure walls connect properly at corners
- 5. Adjust wall thickness if software allows (typically 4-6 inches for interior walls)
Adding Openings
- 1. Place windows at measured positions and heights
- 2. Set correct window width and height
- 3. Add doors with proper swing direction
- 4. Mark door clearance zones (doors need space to open)
- 5. Add any architectural details (archways, columns)
Phase 4: Furniture and Design Elements
This is where your room comes to life. Most 3D planners include furniture libraries, but you can also import custom models or create simple shapes.
Furniture Placement Tips
- Start with largest pieces (sofa, bed, dining table)
- Maintain traffic paths (30-36 inches minimum)
- Use actual furniture dimensions when possible
- Check clearances for drawers and doors
- Consider sight lines and focal points
Design Element Order
- 1. Large furniture (sofa, bed, table)
- 2. Secondary seating (chairs, ottoman)
- 3. Storage pieces (dresser, bookshelf)
- 4. Tables (coffee, end, console)
- 5. Lighting fixtures
- 6. Decorative elements (art, plants)
Phase 5: Lighting and Materials
Lighting Setup
Proper lighting makes or breaks your 3D visualization. Add multiple light sources for realistic results:
- Natural light from windows (adjust time of day)
- Ceiling lights (overhead fixtures, recessed)
- Task lighting (table lamps, floor lamps)
- Accent lighting (picture lights, under-cabinet)
Material Application
Apply realistic materials to surfaces for accurate visualization:
- Walls: Paint colors or wallpaper
- Floors: Wood, tile, carpet textures
- Furniture: Fabric, leather, wood finishes
- Counters: Stone, laminate, wood
Phase 6: Final Rendering and Views
Generate final renders from multiple angles to see your complete design. Most software offers various view options:
2D Floor Plan
Overhead view showing layout and dimensions
3D Perspective
Photorealistic view from eye level
Virtual Walkthrough
Navigate through the space interactively
Rendering Settings
For best results, use highest quality settings available. High-resolution renders take longer but show much more detail. Render multiple views: entering the room, main seating area, and any focal points.
3D Planning for Different Room Types
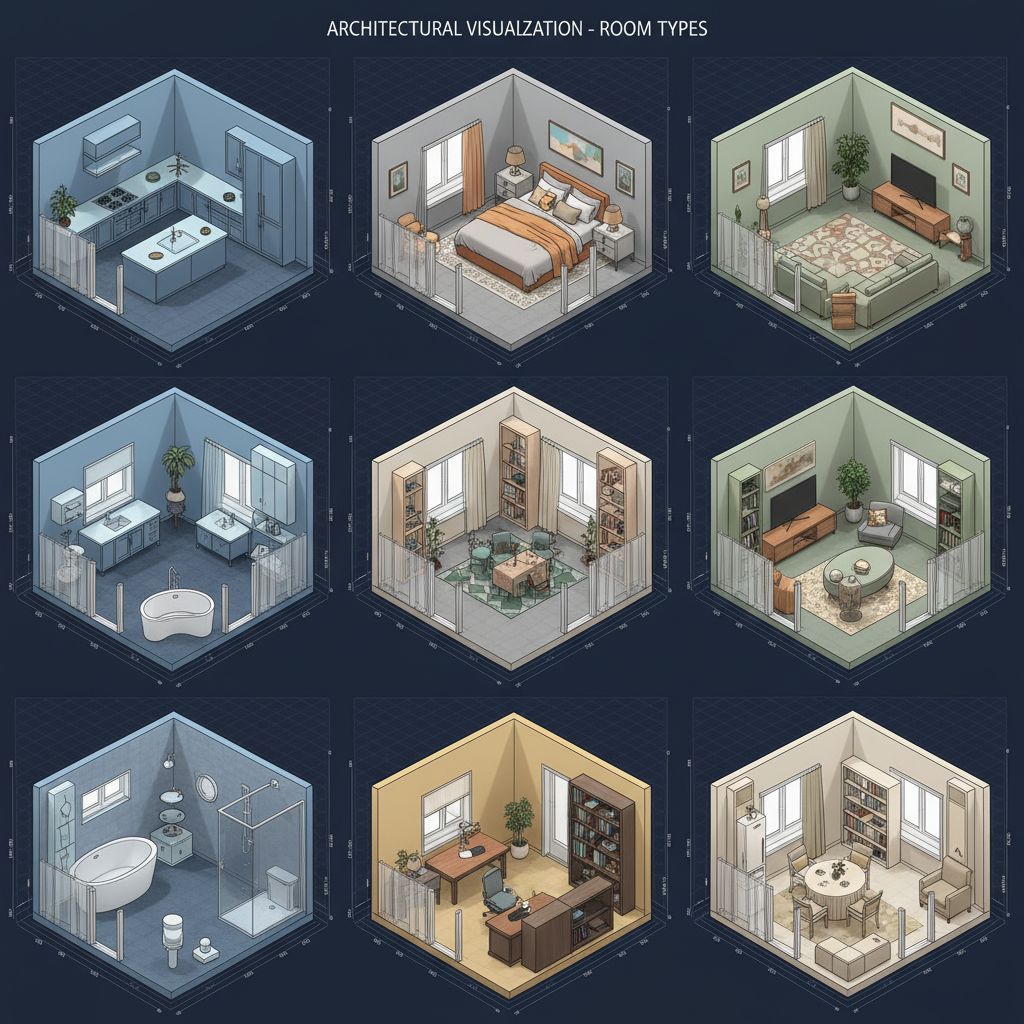
Each room type has unique planning challenges. Here's how to handle the specifics for kitchens, bathrooms, living rooms, and bedrooms.
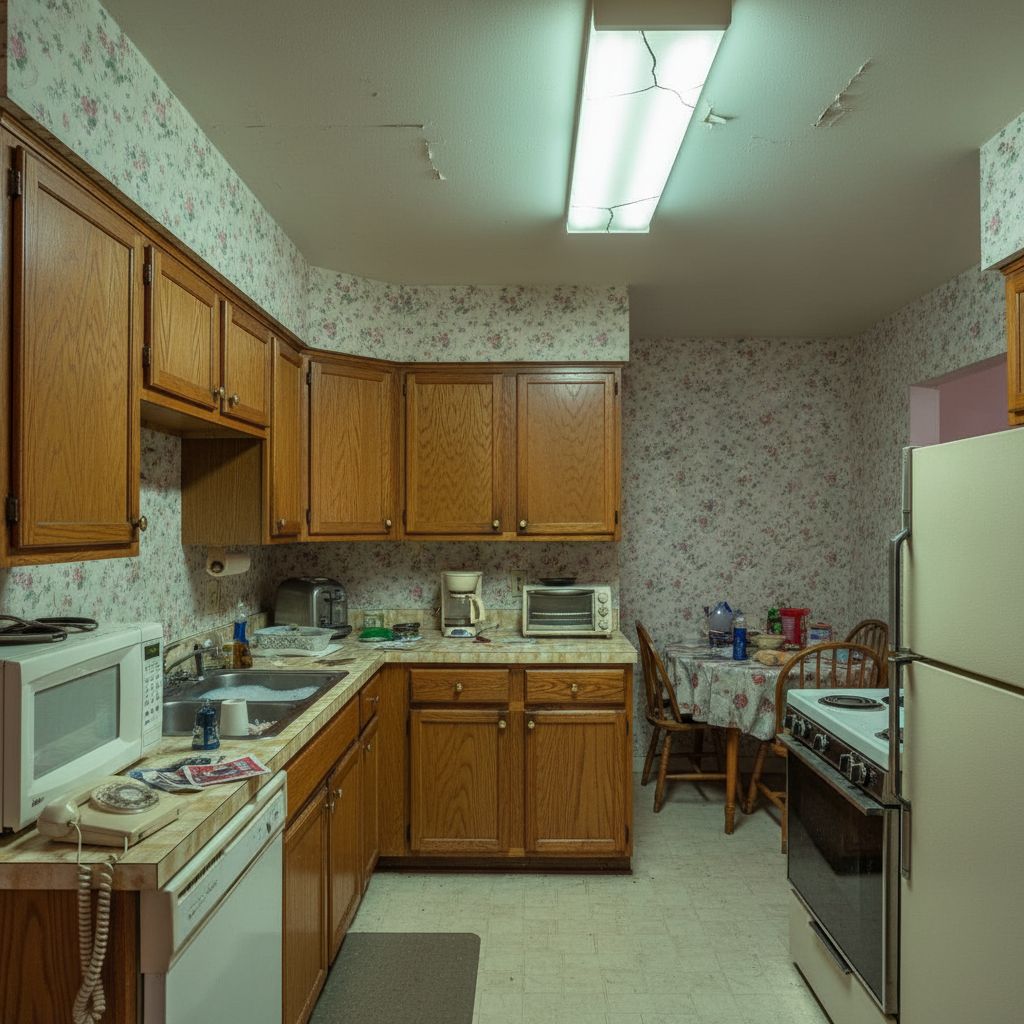
Kitchen Planning Specifics
The Work Triangle
Kitchen efficiency depends on the relationship between sink, stove, and refrigerator. In 3D planning:
- Total triangle distance: 13-26 feet ideal
- No leg shorter than 4 feet or longer than 9 feet
- Traffic shouldn't cross through triangle
Critical Measurements
- Counter depth: 24-25 inches standard
- Aisle width: 42-48 inches for one cook, 48+ for two
- Upper cabinet height: 18 inches above counter minimum
- Landing space: 15 inches each side of cooktop
Bathroom Design Challenges
Fixture Clearances
Bathrooms have strict space requirements. Check these minimum clearances in your 3D plan:
- Toilet: 30 inches wide, 21 inches front clearance
- Sink: 20 inches front clearance, 4 inches side
- Shower: 30x30 inches minimum (36x36 comfortable)
- Tub: 60x30 inches standard
Ventilation & Moisture
Plan for proper ventilation in 3D design:
- Window or exhaust fan required
- Fan should be near shower/tub
- Moisture-resistant materials near water
- Adequate spacing for air circulation
Living Room Layout Optimization
Living rooms need flexible layouts for various activities. Use 3D planning to test different conversation and entertainment zones.
Conversation Area
Seats 8-10 feet apart maximum. Coffee table 14-18 inches from sofa.
TV Viewing
Screen distance = TV diagonal x 1.5-2.5. Eye level when seated.
Traffic Flow
Main paths 30-36 inches wide. Don't block doorways or windows.
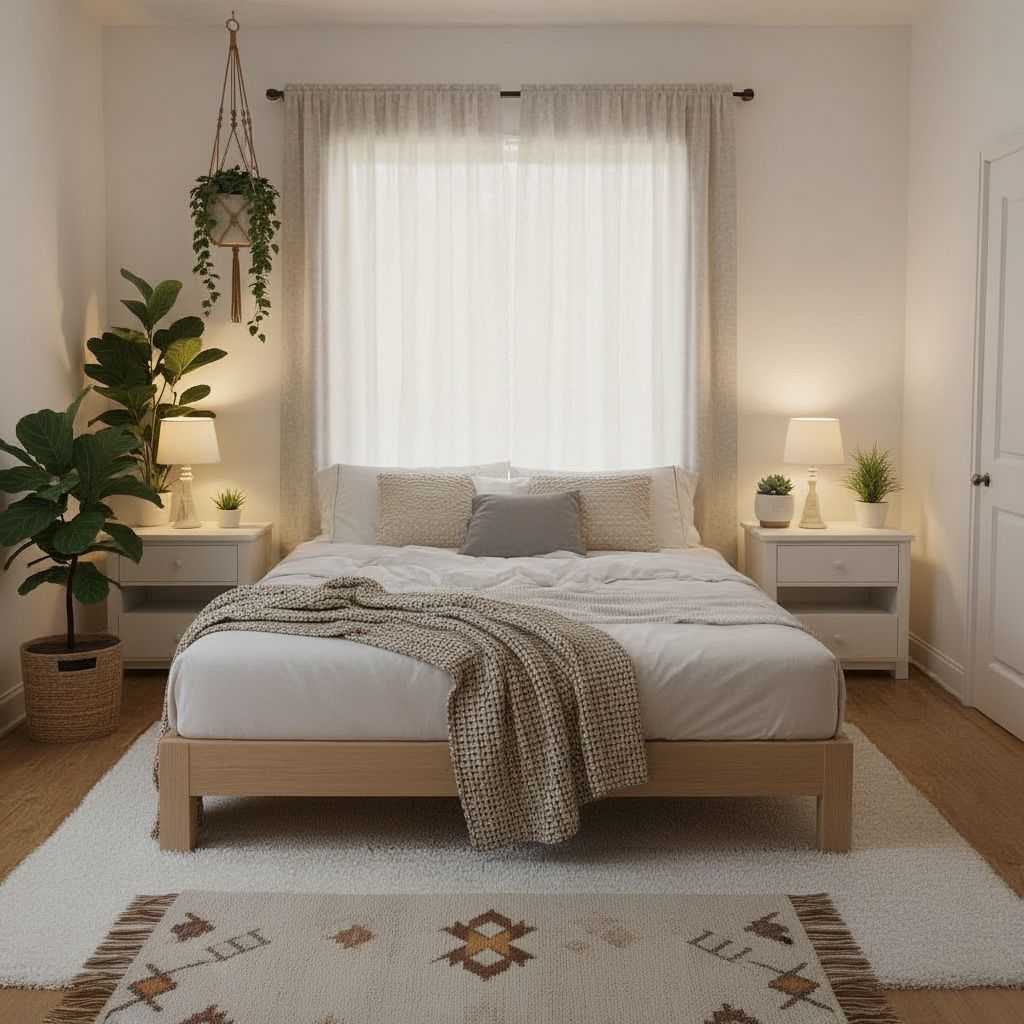
Bedroom Space Planning
Bed Placement
The bed is your bedroom's largest element. In 3D planning, ensure:
- 24-36 inches on each side for walking/making bed
- Headboard against solid wall (not under window)
- Door doesn't swing into bed
- Direct sight line from bed to door
Storage Planning
Plan adequate storage to keep bedroom clutter-free:
- Dresser: 18 inches clearance for drawer opening
- Closet: 24-30 inches depth for hanging clothes
- Nightstands: 20-30 inches from mattress top
- Desk/vanity: if space allows, minimum 30 inches wide
Advanced 3D Planning Techniques
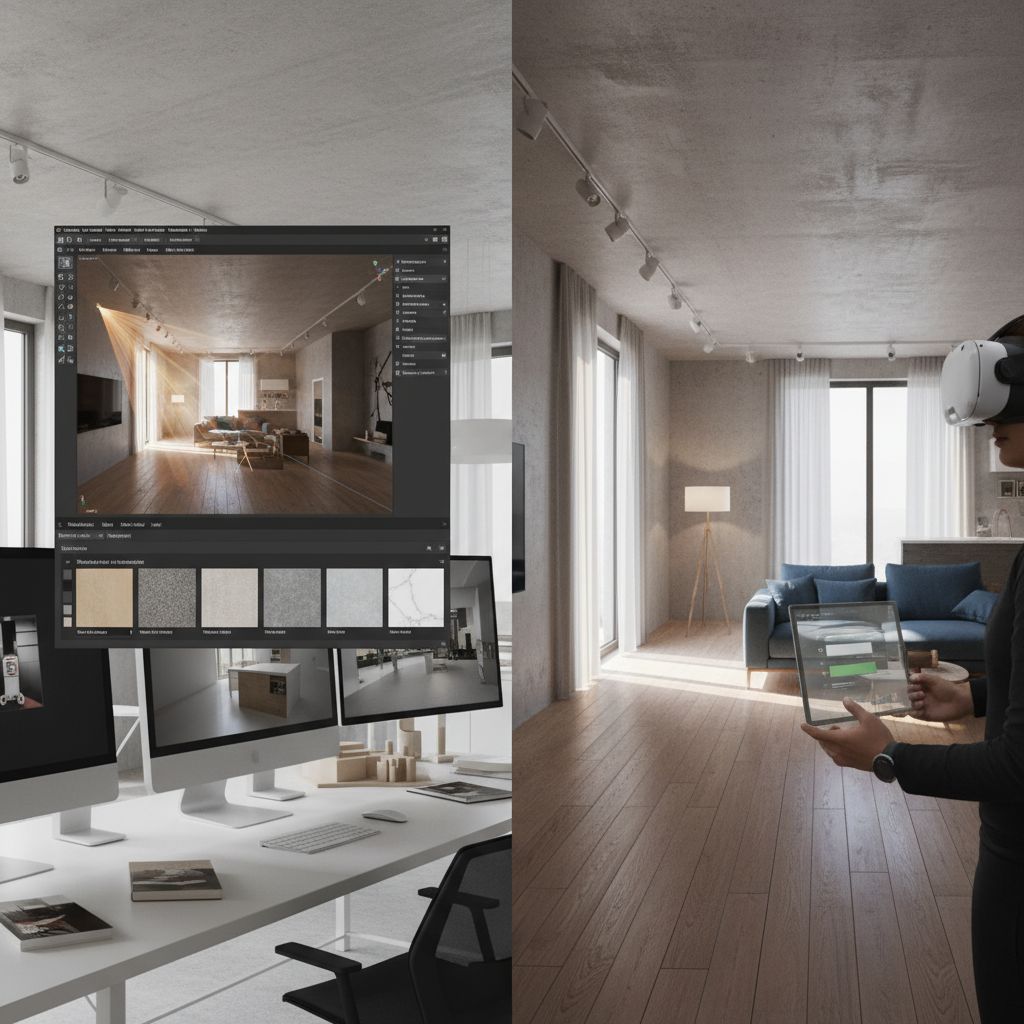
Once you've mastered basic 3D planning, these advanced techniques take your designs to professional levels.
Lighting Simulation
Natural Light Analysis
Advanced software lets you simulate sunlight at different times of day and seasons:
- Set geographical location for accurate sun angles
- Test morning, noon, and evening lighting
- Check seasonal variations (summer vs winter)
- Identify areas that may need supplemental lighting
Artificial Light Design
Create layered lighting schemes in 3D:
- Ambient lighting for overall illumination
- Task lighting for work areas
- Accent lighting for artwork or features
- Dimmer controls for adjustable moods
Material and Texture Application
Realistic materials make 3D renders indistinguishable from photos. Professional techniques include:
Texture Mapping
Apply realistic textures with proper scale. Wood grain direction matters, as does tile pattern alignment.
Reflection Control
Adjust material shininess. Polished surfaces reflect, matte surfaces don't. Subtle reflections add realism.
Bump Mapping
Add surface detail without geometry. Makes flat surfaces appear textured (brick, stucco, fabric weave).
Virtual Reality Integration
Some advanced 3D planners support VR headsets, letting you "walk through" your design before it's built. This is incredibly powerful for:
Spatial Understanding
Experience room scale and proportions naturally. Identify issues invisible in flat renders (ceiling feels low, room feels cramped, etc.).
Client Presentations
Let clients experience the space before construction. Dramatically reduces misunderstandings and change orders.
Collaboration Features
Modern 3D planning tools enable real-time collaboration with contractors, designers, or family members:
- Cloud Sync: Work on same plan from different devices and locations
- Comment Tools: Add notes and feedback directly on 3D models
- Version Control: Track changes and revert to previous designs
- Share Links: Send view-only links to gather opinions without editing access
Common 3D Planning Mistakes
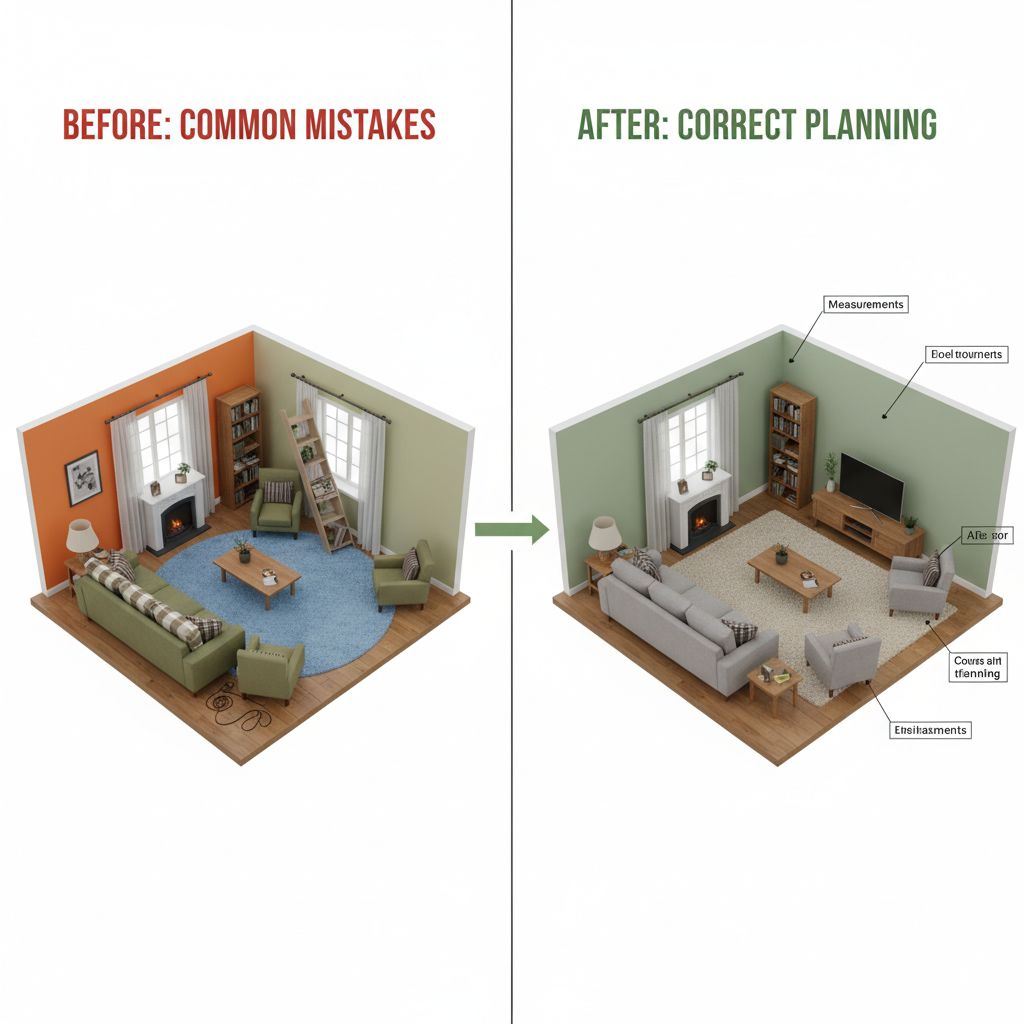
Even experienced planners make these errors. Recognizing them early saves time and produces better results.
❌ Inaccurate Measurements
The #1 problem: rushing measurements or estimating instead of measuring. Your 3D plan is only as accurate as your input data.
The Fix
Measure twice, input once. Use a laser measure for accuracy. Verify measurements before finalizing walls. Double-check window and door positions—they're often off by several inches in hastily measured plans.
❌ Ignoring Door Swings and Clearances
Furniture looks perfect in 3D until you realize the door hits it, or a drawer can't open fully because another piece is too close.
The Fix
Mark door swing areas in your plan. Check drawer and cabinet clearances (add 18-24 inches). Test all traffic paths. Walk through your 3D space virtually from multiple directions to catch these issues.
❌ Forgetting About Electrical and Plumbing
Beautiful 3D design that requires moving outlets, switches, or plumbing becomes expensive fast. Factor in existing infrastructure.
The Fix
Mark all outlets, switches, and plumbing locations in your plan before placing furniture. Design around them when possible. If moves are necessary, budget accordingly—electrical work costs $50-100 per hour, plumbing even more.
❌ Unrealistic Furniture Dimensions
Using generic furniture from software libraries that don't match real pieces you plan to buy. That standard "sofa" might be smaller or larger than your actual purchase.
The Fix
When you know specific furniture pieces, create custom objects with exact dimensions. Most software lets you modify library items or build simple shapes. A few minutes ensuring accuracy prevents expensive mistakes.
❌ Overlooking Scale and Proportion
Furniture that looks right on screen can overwhelm or underwhelm a space in reality. 3D views can distort perception of size relationships.
The Fix
View your design from eye level (5-5.5 feet high) in 3D software. Compare furniture sizes to human figures (most software includes these). Use the two-thirds rule: furniture shouldn't exceed 2/3 of wall length for balanced proportions.
Professional vs DIY 3D Planning
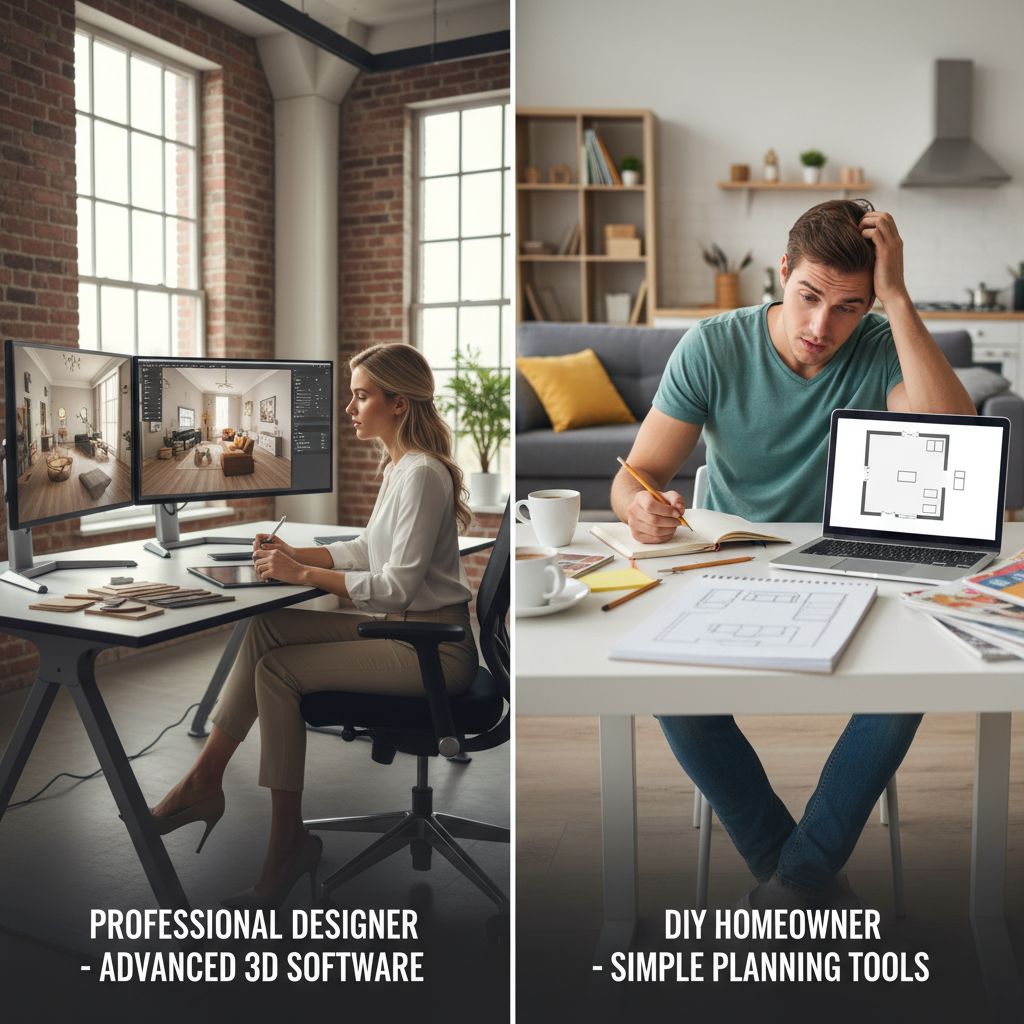
Deciding whether to hire a professional or DIY your 3D planning depends on project complexity, budget, and your technical comfort level.
When to DIY
Good Candidates for DIY Planning
- Simple room layouts without structural changes
- Furniture rearrangement and decorative updates
- Projects under $10,000 budget
- Single room renovations
- When you enjoy learning new software
DIY Time Investment
Expect 5-10 hours for first project: 2-3 hours learning software, 2-4 hours creating plan, 2-3 hours refining. Subsequent projects take 50-75% less time as you gain experience.
When to Hire a Professional
Projects Needing Professional Help
- Structural changes (walls, beams, load-bearing elements)
- Complete kitchen or bathroom renovations
- Projects over $25,000 budget
- Complex electrical or plumbing requirements
- When permits and code compliance are involved
Professional Costs
3D planning services: $500-2,000 for residential rooms. Full design services including 3D plans: $2,000-10,000+. Cost often recoverable through avoiding expensive mistakes and optimized material purchasing.
The Hybrid Approach
Many successful projects combine DIY planning with professional consultation. Create your own 3D plan to explore ideas and understand your preferences, then hire a professional for a few hours to review your design, identify problems, and optimize the layout.
Phase 1: DIY
Create initial 3D plan yourself. Test ideas and layouts.
Phase 2: Review
2-3 hour professional consultation to refine design.
Phase 3: Implement
Execute with confidence in optimized plan.
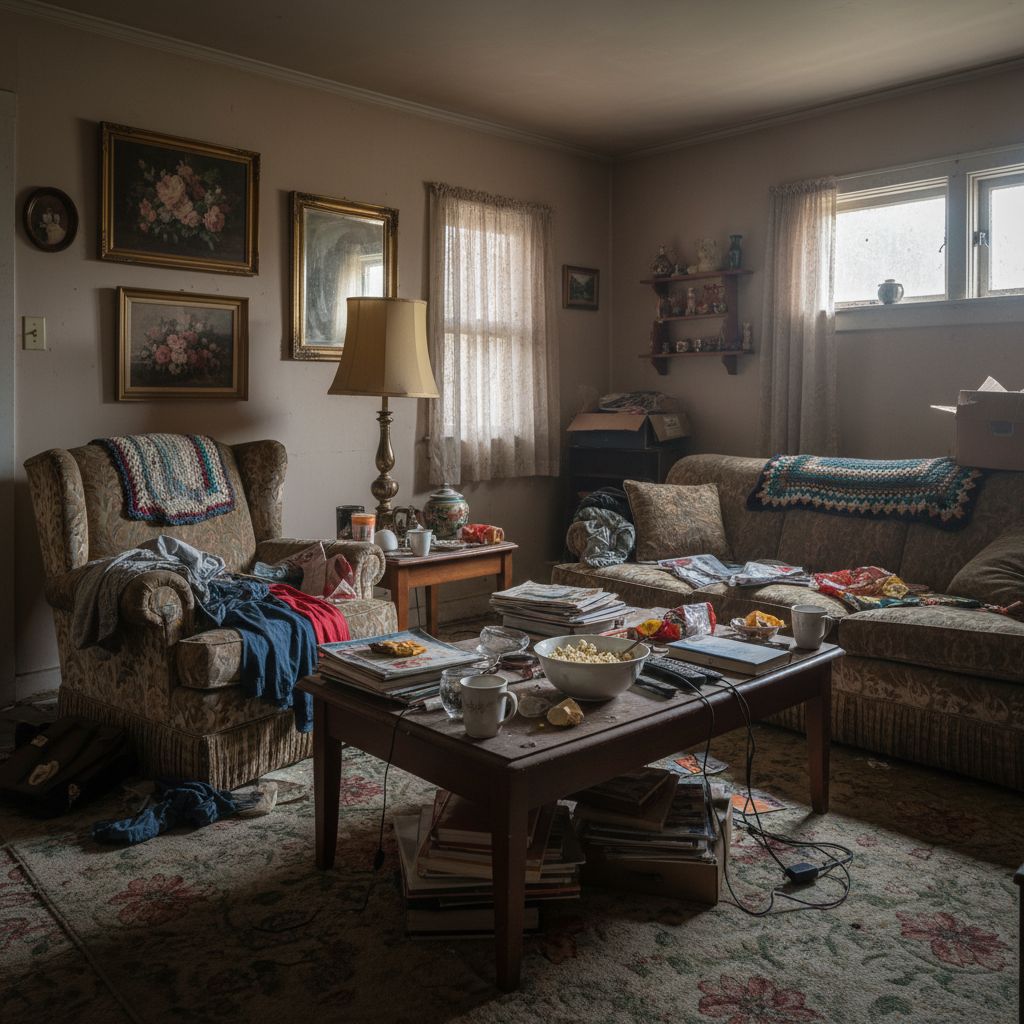
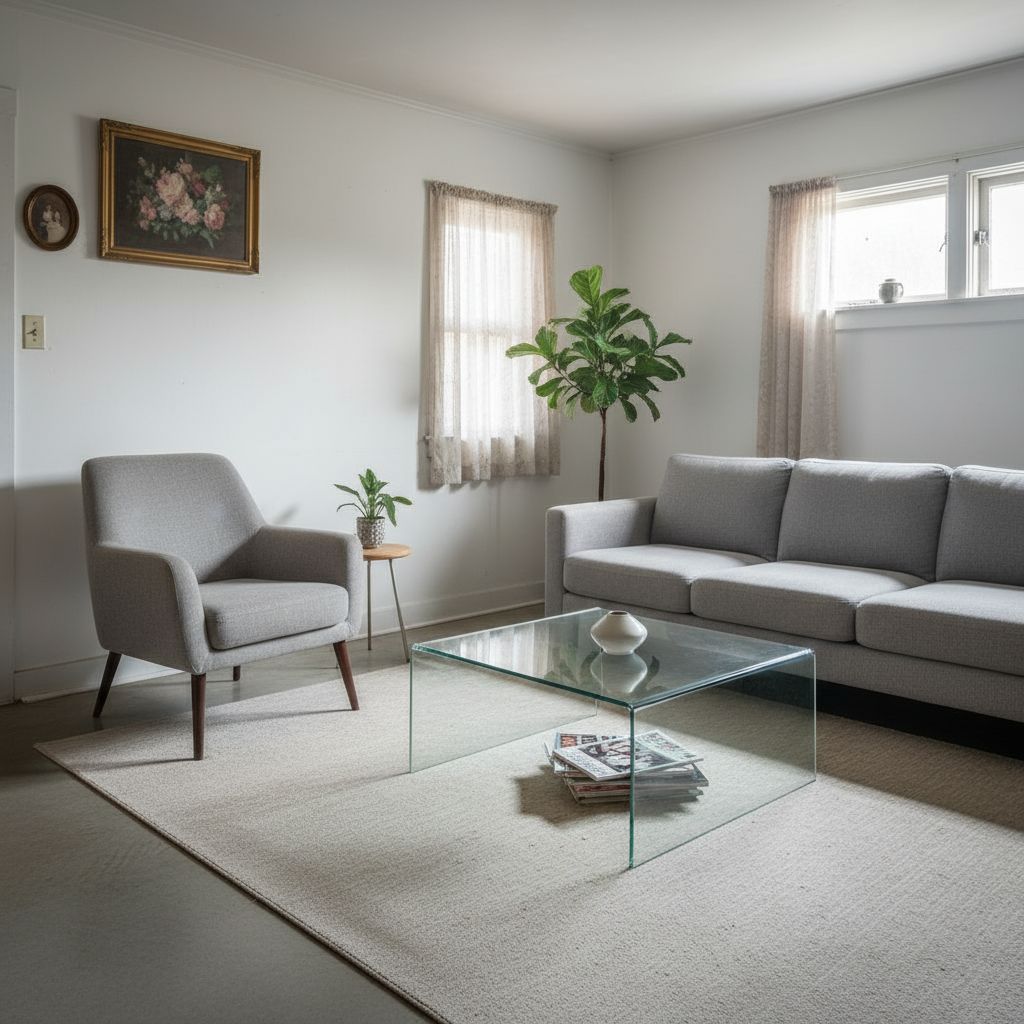
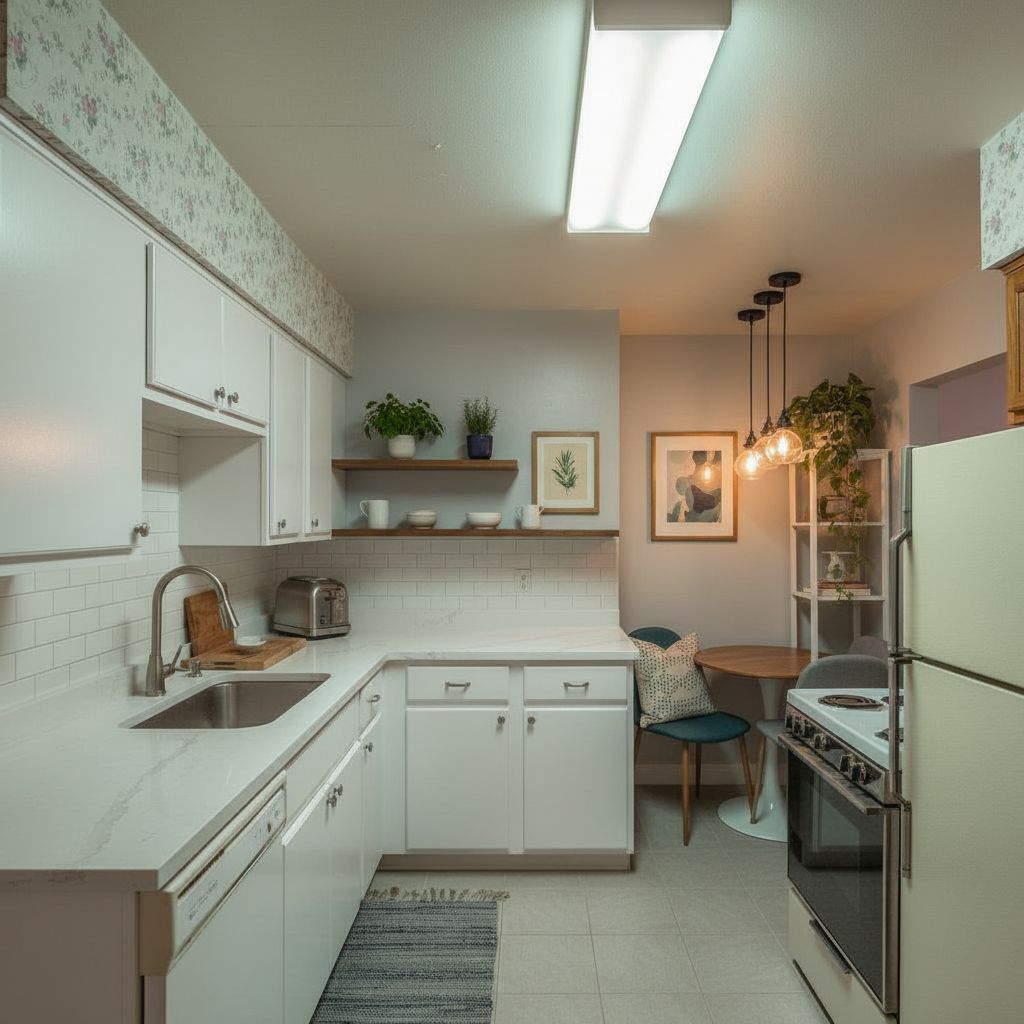
Skip Complex 3D Software - Try AI Design Instead
While 3D planning tools are powerful, they require time and technical skills. Decoratly's AI offers a faster alternative: upload a photo of your room and see professional redesigns in 30 seconds—no 3D modeling required.
No Learning Curve
Just upload and choose your style
Instant Results
See multiple designs in minutes
Professional Quality
Photorealistic visualizations
Perfect complement or alternative to traditional 3D planning